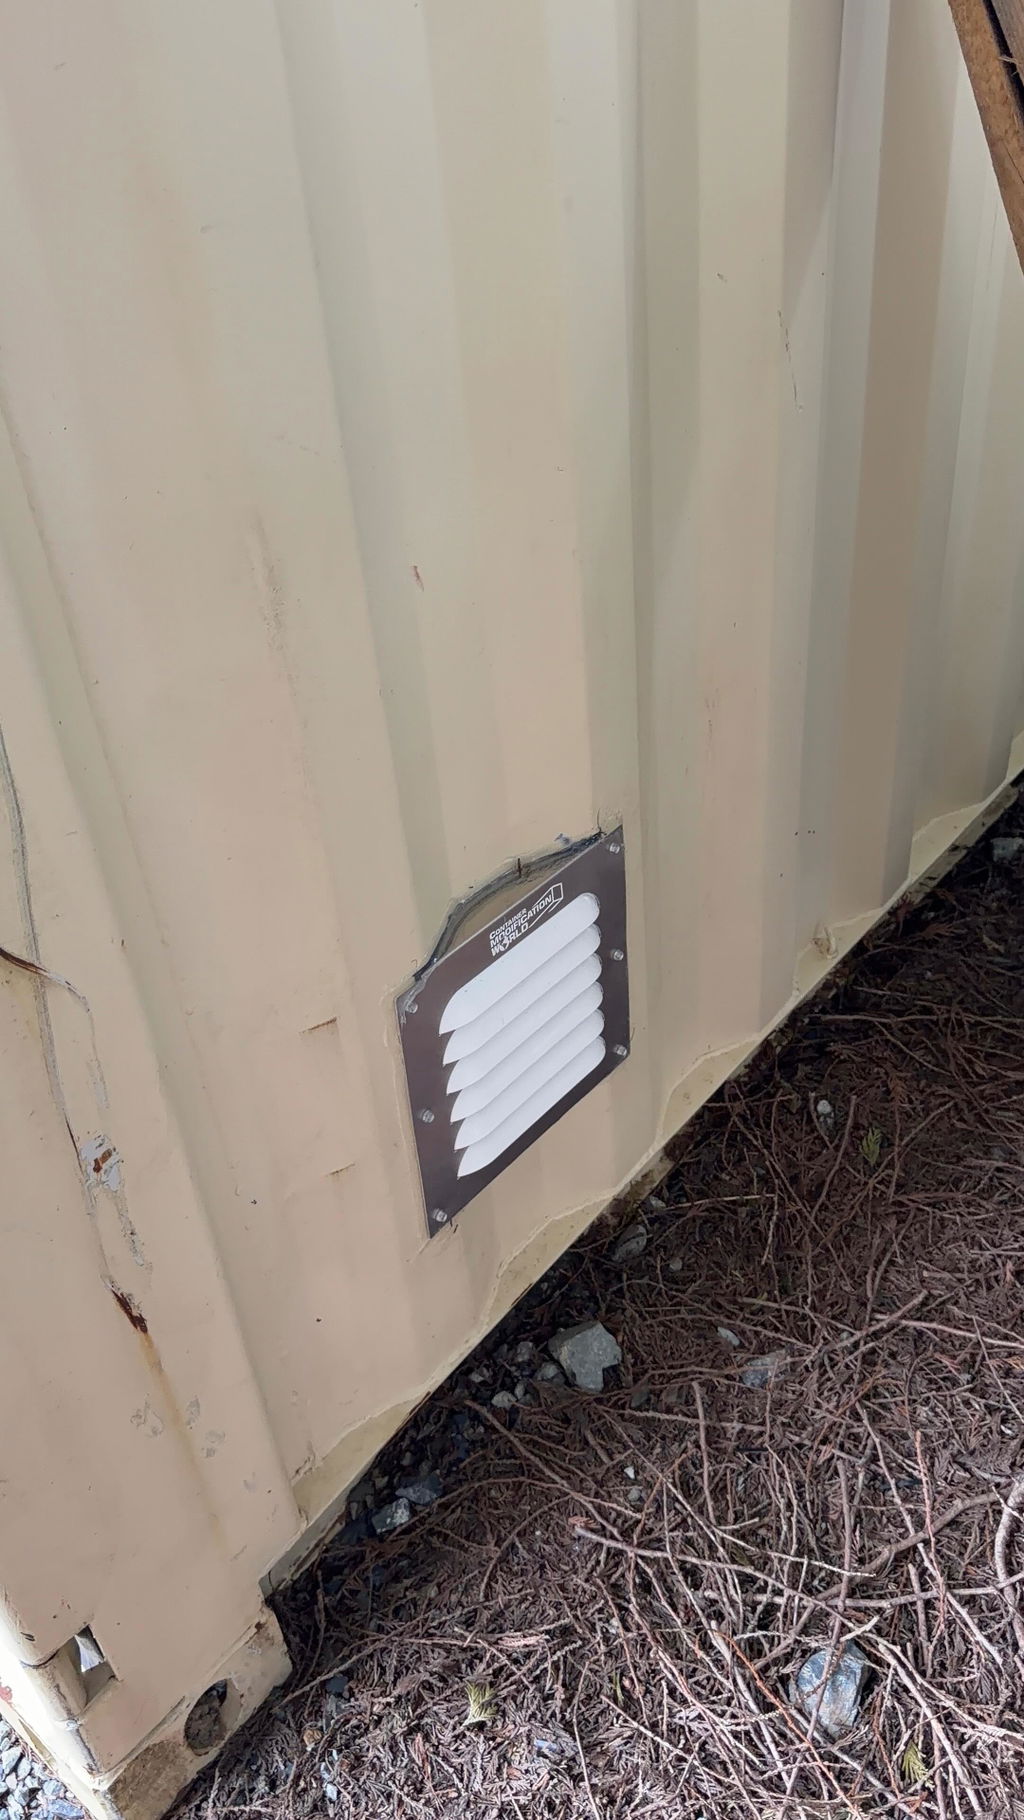


Description
BigAir30 Louvered Gable Vents
BigAir Louvered Container Vents are engineered to be installed anywhere on shipping container sidewalls, end walls, or doors - from floor to ceiling.
- BigAir Louvered Container Vents (sizes: 30, 45 & 60), come with a marking guide to make cutting a hole as easy as possible! Rivets (Alum/Alum, 3/16", 1/4") and self-tapping screws are also included (we recommend using rivets).
- Eliminate moisture and excess heat with our state-of-the-art computer-modeled design. Made with highly durable Polypropylene and Aluminum, the BigAir will never rust!
- The variables inside a shipping container are always changing. When the combination of those variables creates an environment prone to humidity, condensation will happen.
The above-mentioned variables include, but are not limited to the following:
- Humidity
- Interior temperature
- Exterior temperature
- Wind direction
- Wind speed
- Foundation
- Adequate airflow under the container
- Direct sunlight to roof
- Direct sunlight to walls/doors
- Type of contents stored
- The volume of contents stored inside
- Color of container
- Number of stock vents in the container
Specifications
- Designed to be installed anywhere on shipping container side walls, end walls, or doors from floor to ceiling. Fits: 8', 9', 10', 20', 40', 45', 48', 53' corrugated and smooth wall shipping containers, van trailers & all wood construction buildings
- Utilizes Duraflo 680812 CSA Approved Gable Vent
- High UV-Resistant Polypropylene and laser-cut aluminum frame will never rust!
- 30, 45, or 60 Sq. In. Net Free Area, depending on the size of vent you choose
- BigAir30 = 9” x 10 ½” Rough Opening
- BigAir45 = 9" x 14" Rough Opening
- BigAir60 = 9” x 17 ⅞” Rough Opening
- Disclaimer: Ensure Your Container Complies With OSHA When Storing Hazardous Materials
Included hardware
- A minimum of two vents are required per container for temperature & moisture control in temperate climates. Four vents per container are suggested in tropical climates. For HAZMAT ventilation, two vents installed high and two vents installed low are suggested. It is the customer's responsibility to ensure OSHA compliance when storing hazardous materials.
- Steel/Steel, 3/16", 1/2" Rivets and No.10, 7/8"Hex Head Self-Tapping Screws
Photo gallery
Installation Instructions
BigAir30 Installation Instructions (Download PDF)
BigAir45 Installation Instructions (Download PDF)
BigAir60 Installation Instructions (Download PDF)
Short Link
https://containermodificationworld.com/bigair30-vents
How to install BigAir30
4 steps per vent. Read every step before you cut.
Corrugated walls only
BigAir30 is corrugation dependent. Center the cut-out on an inner corrugation so the flange sits on the outer corrugations.
In the box
- BigAir30 vent
- Rivets or self-tapping screws, 6 per ventRivets recommended
- Marking sheet9″ × 10½″ cut-out template
You supply
- Power drill
- 3/16″ rivet gun or driver
- Zip cutter
- Caulking gun and silicone
- Marking pen
- Eye and ear protection, work gloves, steel-toed footwear
Before step 1
Plan where the vents go

- High vent: top of the cut-out at least 2″ below the top rail.
- Low vent: bottom of the cut-out at least 5.5″ above the bottom rail.
- Check the inside wall at both spots for framing, wiring or insulation before you mark.
01
Step 1 of 4
Mark and cut the opening

- Hold the marking sheet on the wall with the cut-out centered on an inner corrugation.
- Keep the top of the cut-out at least 2″ below the top rail (or 5.5″ above the bottom rail for the low vent).
- Trace the full 9″ × 10½″ opening, then remove the sheet.

- Cut along the traced line with a zip cutter.
- Keep the corners square so the vent body drops in cleanly.
Safety: wear eye protection and gloves. Cut steel edges are sharp.
02
Step 2 of 4
Silicone, set the vent and drill

- Run a bead of silicone on the wall down each side of the cut-out.

- Run a quick bead on the back of each side flange of the vent.

- Push the vent into the opening from outside with the CMW logo at the top.
- Check it sits flat against the outer corrugations.
- Drill through the wall using the 6 pre-lasered holes in the flange as your guide.
03
Step 3 of 4
Rivet or screw it on

- Fasten through all 6 holes with rivets or self-tapping screws.
- Rivets are recommended. Set them snug, without bending the flange.
04
Step 4 of 4
Seal all around

- Run a continuous bead of silicone all the way around the outside edge of the flange.

- From inside the container, cover each fastener with silicone.
Repeat for the second ventSame 4 steps, at the opposite end and low on the wall.